Getting started
The first time you use tPMHighlighter, you will need to be connected to the internet so you can process your texts.
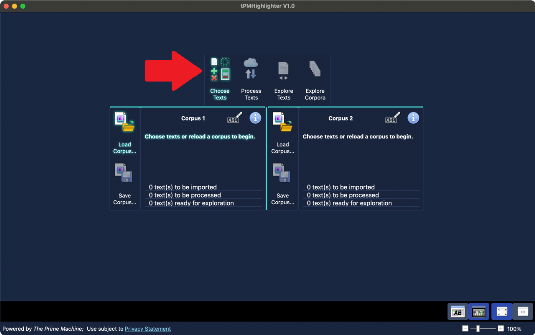
When the program starts, you will see the main menu.
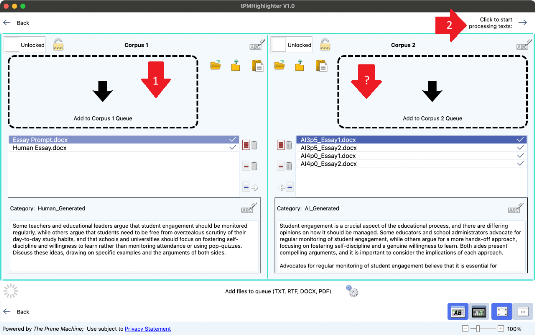
To build a new corpus, you will need to use the “Choose texts” option first. This takes you to a new screen where you can drag-and-drop or open files or folders containing the texts you want to analyse.
Using prepared texts for a demo
If you just want to test tPMHighlighter out, you can either download a ZIP containing two ready-built corpora or download a ZIP containing DOCX files. See the section below if you use the ready-build corpora. Inside the second ZIP there is one file containing an essay question topic written in the style of an English language test, there’s a human-generated essay (written for this website) as well as four AI-generated essays. You’ll need to drag and drop these files into the “Choose texts” screen and then process them.
These texts were created for demonstration purposes and the views expressed do not necessarily reflect those of the developer or this website.
Processing imported texts
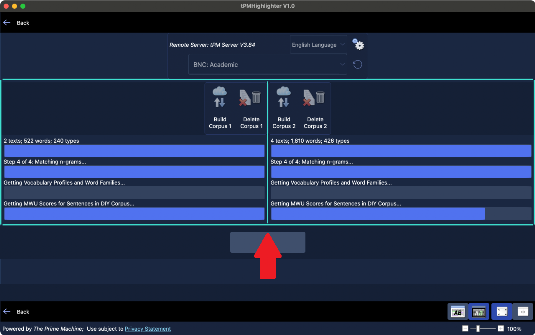
After importing the texts, you will need to choose the “Process texts” option which will take you to a different screen where you click “Build” to compile the texts into a corpus and to start transmitting the words, word combinations and sentences to The Prime Machine server for analysis.
Please be patient while this process completes. Even a short essay generates many combinations of words and tPMHighlighter performs all the analysis in one big step.
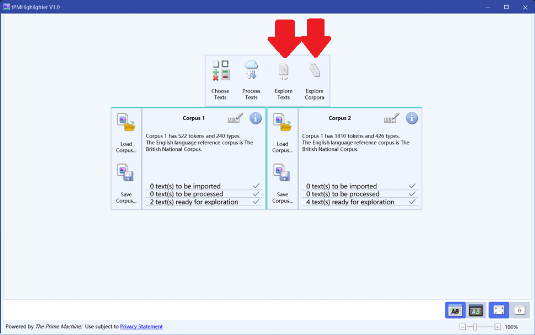
Once this is finished, two ways of exploring your data will be available: “Explore texts” and “Explore corpora”.
Re-opening a saved corpus
If you have used tPMHighlighter before and you have saved a corpus, you can load the corpus file from the main menu. It is possible to load two of your own corpora at the same time, to either view results side by side (on a wider screen) or to do cross-corpus analysis.
Viewing the results
The “Explore texts” screen allows you to select one text at a time and to highlight textual features. The “Explore corpora” screen gives more data tables, allowing you to see patterns across your corpus.
From the results screens, you can switch between Exploring Texts or Exploring Corpora using the buttons in the bottom-left corner.
The toolbar at the bottom of the screen includes options to switch between light and dark mode. This is particularly important for text highlighting functions because in light mode the background of the words will be coloured while in dark mode the font colour of the words will change. If the display is wide enough, this toolbar also allows you to switch between viewing one or two sets of results at the same time side by side.

The toolbar below each table of results has buttons to rotate the table (swapping columns and rows), to take a scrolling screenshot or a screenshot of the currently visible data, and to save the grid as HTML, XLSX, XLS, CSV or PDF.
There are 6 different ways of looking at your text data. Click the buttons at the top to move between the different views.

Importing text
Text can be imported from a variety of file formats: TXT, DOC, DOCX, RTF and PDF. Since they may contain images of text or be organised in a complex manner, it is not always possible to import PDF files correctly.
As well as dragging and dropping files, you can use the open, open folder or paste buttons.
Clicking the “Paste” button will take the contents of the clipboard and add this to the corpus queue as a separate text. Each time you click “Paste”, a new text will be created.
Two corpora can be built and used at the same time. The left-hand side of the screen shows the files and buttons for “Corpus 1” and the right-hand side of the screen shows the files and buttons for “Corpus 2”. There are buttons to delete one or all items from the queue and to move a text from one corpus queue to another.
Once the texts are ready for processing, you can click the right arrow at the top of the screen or choose “Process Texts” from the main menu.
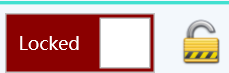
Once texts have been processed, the corpus content will be “locked”. This means if you want to change or delete any of the texts, you will need to delete the downloaded content and re-process the corpus after you make any changes.
Click the padlock to delete the downloaded data and allow you to edit the file list.
Alternatively, you can click Delete Corpus from the Processing screen.
These only delete the corpus data from memory; they do not affect files you have saved on your computer.
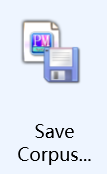
Once a corpus has been built, you can save it as a tPMHighlighter file which contains all the texts as well as all the data tables for n-grams, vocabulary profiles, keywords, etc. Saving a corpus means you can re-open it and analyse the results without needing to be connected to the server.